Thursday, October 31, 2013

Apple cider doughnuts

A Halloween morning treat. 

I started with this famous family recipe (below) from my Mom's awesome cookbook, then messed with it. 

First, this makes tons, so cut the recipe in half. Then I adjusted the spices and used apple cider instead of buttermilk - I don't know how much (just poured til it looked right). 

Topped them with a powdered sugar/apple cider glaze. If I'd have had more time I might have chopped up some apples (tiny) to put in the batter.


They are cooked in this old '70s donut cooker (below). Not deep fried, so almost good for you!! :)


Of course you CAN deep fry them, or maybe they'd be good if you filled muffin cups about half full and baked them. Let me know of you try that! 

Saturday, September 28, 2013

Yummy Vegan Dip or Sandwich Spread

Yes, believe it or not, I'm back.

I am trying to eat mostly vegan now - for a number of reasons, so my recipes may reflect my new attempts at creating vegan delicacies.

So I have some cut up vegetables - broccoli, cauliflower, celery, and carrots - and I've discovered that I like all of them, but am not terribly fond of the broccoli (raw at least). I seem to remember I used to like broccoli raw, but it's just not tripping my trigger right now. So I thought, what am I going to do with all this broccoli?

I got some very yummy 8-grain bread (which is probably not vegan, but I bought it before I was serious...), and wanted a sandwich - so I decided to make a sandwich spread. Now I've made sandwich spread with pinto beans or kidney beans in the past - going for a chili/taco kind of flavor - so I thought something similar to this might be a good way to get rid of my broccoli.

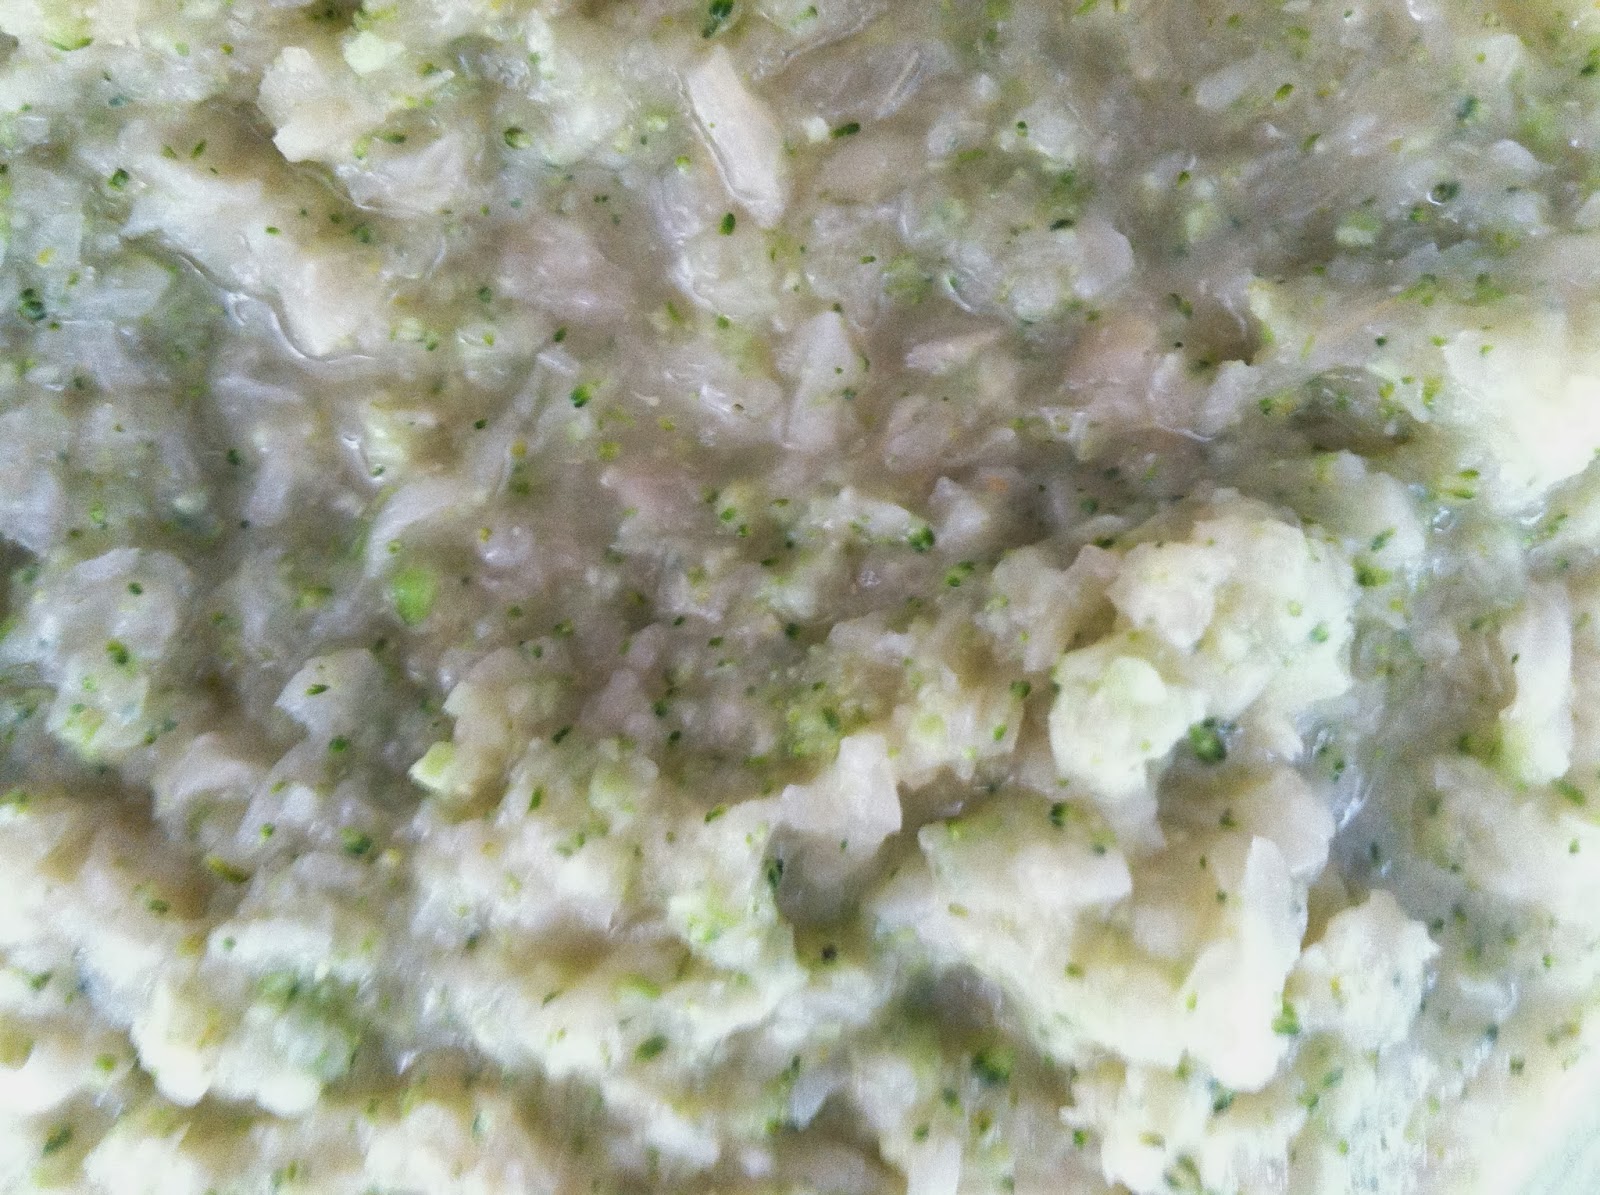
So I took a good handful of broccoli florets and threw them in the food processor. Then I added a can of butter beans (thought maybe their mild flavor would mix better with the broccoli) and processed them to death. Or at least til it was smooth consistency.

I tried it - and it tasted like broccoli and butter beans.

That's NOT what I was going for, but I must admit, I wasn't too surprised.

So I went back to the pantry and looked for something that was low/no-fat, low-calorie, and strong flavor to hide the broccoli taste (yes, I am a child...). Then I saw the can of sauerkraut! Perfect, I thought! I love sauerkraut, and I love it on sandwiches - like reubens, etc. So this should definitely cover the broccoli flavor.

So I dumped in the can and processed again. It's surprisingly delicious - if you like sauerkraut, I suppose. My husband tried it on a couple crackers and really liked it.

I toasted up a piece of that 8-grain bread and spread 1/4 c of my concoction on top. It was delicious! I look forward to lunch tomorrow! Maybe I'll eat it with tomato slices! Mmmmm!

Tastes better than it looks - AND - tastes better than it smells.
The sauerkraut smell is strong, but not as strong of a taste.
Broccoli Butter Bean Sauerkraut sandwich spread

  • 1 large handful broccoli florets (1.5 c??)
  • 1 can butter beans (1 4/5 c.)
  • 1 can sauerkraut (408 g)
Blend ingredients in food processor until thoroughly mixed and desired consistency. 

Serving size 1/4 c. 
Makes about 24 servings

Per serving:
  • Calories - 21
  • Fat - 0
  • Cholesterol - 0
  • Protein - 1
  • Sodium - 170
  • Calcium - 1


Saturday, October 1, 2011

Pumpkin Muffins


I made pumpkin muffins this morning - to welcome October. They were low-fat and low-enough calorie that I had two! :)

Pumpkin Muffins
  • 1 egg
  • 1/2 c skim milk
  • 1 15-oz can pumpkin
  • 1 1/2 c flour
  • 1/2 c sugar
  • 2 tsp baking powder
  • 1/4 tsp salt
  • cinnamon & spices to taste
beat egg & milk and mix in pumpkin
add dry ingredients and mix
scoop into 12 muffin cups (I used a bit of non-stick spray in a stoneware muffin pan)
bake at 350 for about 25-30 minutes

makes 12 muffins
each muffin has:
  • 101 calories
  • 0.4 g fat (0.1 g saturated fat, 0.2 g monounsaturated)
  • 15.6 mg cholesterol
  • 135 mg sodium
  • 5 mg potassium
  • 21.2 total carbs (1.9 g dietary fiber, 10.1 g sugar)
  • 2.8 g protein
  • 24.3% vitamin a
  • 0.8% vitamin c
  • 7.3% calcium
  • 4.3% iron

Kelan pulled a container of whipped topping out of the fridge and put that on his. Then everyone else did. So I looked it up. Turns out 1 Tbsp had only 13 calories and 1 g of fat, so I put a bit on my last bite. YUM! It tasted like pumpkin pie!

(there's no picture, because I didn't think to take one when I first made them, and they didn't last long.... I'll have to make them again soon, so I can get a pic!)

Saturday, September 24, 2011

Multi-Chocolate Chocolate Chip cookies - Guest Chef

Here's another winner from my dear friend John Lansford. I really wish he lived closer to me. 
-------------------------------
I made a batch of Multi-Chocolate Chocolate Chip cookies today and took them to the restaurant we eat at on Sunday. The manager came out and said "if you never make another kind of cookie again, please keep making these!" Our waitress and several others also came over and claimed these cookies were great!

Here's the recipe. It makes a very rich, chocolaty cookie with a brownie like texture, and a hint of mint flavoring.

1 1/2 cups flour
1 tsp baking soda
1 tsp salt
1 cup cocoa
1 lg pkg of instant chocolate pudding
8 oz semisweet chocolate
4 oz unsweetened chocolate
1 1/2 sticks butter
1 1/2 cups brown sugar
4 eggs
2 tsp vanilla
1 tbs creme de menthe
3 cups chocolate chips

Preheat the oven to 325 degrees.

Mix the flour, salt, baking soda, cocoa and pudding mix together in a separate bowl, and set aside.

Melt the semi sweet and unsweetened chocolate together with the butter and stir until well mixed. Add the brown sugar and stir. Add the eggs one at a time and beat into the mixture. Mix the vanilla and creme de menthe into the mixture.

Gradually add the flour mixture into the batter and stir until combined, then add the chocolate chips. 

Using a teaspoon, drop portions of the batter onto cookie sheets lined with parchment paper, and bake for about 10-12 minutes or the cookies are firm. The batter will be very stiff, so you may need to use two spoons, one to scrape it off the other.

This recipe makes about 4 dozen cookies.

Haven't been cooking a lot lately...

...can you tell?

I've been very busy with my work, so I have enlisted the three kids to each cook twice a week. That just leaves me Sundays to cook. It's been a real blessing for me getting more stuff done, but it's taken a toll on this blog! Never fear, i will continue to add new things as they're created, but with the kids cooking, it's been a lot of repeats and bad-for-you chicken nugget nights.

Just wanted to check in. I haven't forgotten about you! :)

Sunday, July 31, 2011

French Toast

Merrick made his first dinner for the family the other night. He made french toast! Our church has a food pantry that receives day-old bread from Panera, and often they have more bread than they can give out to food pantry clients in the week, so we take some home. This is the best kind of bread for french toast - not necessarily Panera, but any kind of bread that is a few days old - starting to get a little dry, but not crispy. We like white bread best for french toast, but wheat bread also makes very good french toast - just has a different flavor. Old hot dog, hamburger, or other buns also make great french toast!

Ingredients:
bread
eggs
milk
sugar
salt
cinnamon (optional)
vanilla (optional)
butter (for frying)

It's really pretty hard to mess up french toast. I use about 1 egg for every cup of milk, so for our family, I usually crack 3 eggs and add about 3 cups of milk. I throw in a bit of sugar (maybe up to a tablespoon) and a pinch of salt. Sometimes for fun, I'll add a bit of cinnamon (1/2 tsp or so) and some vanilla extract (1/2 tsp or so). These aren't really necessary, as just plain old french toast tastes great, too.

Beat the eggs and add the milk, then add any other ingredients if you wish. Preheat a large skillet or frying pan (I like to use an electric griddle) and run a stick of butter over the hot pan to get a bit of butter everywhere. Then dunk a piece of bread into the egg/milk mixture. Be sure it's completely covered, but don't leave it in there very long, or it will start to fall apart. Quick and gentle is the key here. Then take the bread out and put it on the hot pan. Fry for a few minutes until it starts to brown, then turn over to fry the other side.

Most folks like to eat it with butter and syrup. I happen to prefer butter & powdered sugar. Some even like brown sugar! Be creative! Enjoy! :)

Friday, April 15, 2011

Stuffed Pepper Soup

Yum! I can't wait to try this. This is from my best friend from junior high, De'Reen Vyleta.

Stuffed Pepper Soup
  • 2 lbs ground beef
  • 1 med onion chopped
  • 2T chopped garlic
  • Salt and pepper to taste
  • 3 lrg peppers-cubed
  • 1 lrg can veggie juice (V8) plus 1 can water
  • 1 lrg can petite diced tomatoes undrained plus one can water
  • 2c rice
  • 1T Worcestershire sauce (optional)
  • Salt and pepper to taste
In a large pot on md/high heat, brown beef with onion and garlic.

Season with salt and pepper

Add the rest of the ingredients. Stir.

Bring to a boil stirring often.

Once it reaches a boil reduce heat to simmer (low) and continue to cook for 25 to 30 mins or until rice is cooked through.

Don’t forget to stir occasionally or rice will sink and stick to the bottom.

Sunday, February 6, 2011

Great Link: StillTasty.com

StillTasty.com has comprehensive information about how long you can keep thousands of foods and beverages.

How long will your favorite food or beverage stay safe and tasty? What's the best way to store it? Get answers for thousands of items on this site!

Here are some of their featured questions:


  • Is it OK to put hot food directly into the fridge?
  • Should you store bread on the counter or in the fridge?
  • Are eggs still safe after the expiration date?
  • More Questions>>


Expiration Dates: Should You Pay Attention?
The dates on food labels can be confusing. The truth is, they often have nothing to do with food safety. Here's what you really need to know. Read More » 

Sturdy Staples: 9 Foods That Can Outlast You When stored properly, these everyday items will last for years — sometimes decades — even after they’ve been opened. Read More » 

 10 Surprising Foods You Can Freeze Freeze these less-than-obvious items and you'll save money, waste less — and make cooking a whole lot more convenient. Read More »

Amazing Avocados How to keep them fresh for your Super Bowl guacamole.

Quick Tip The best place for storing eggs and milk.

You can even get a StillTasty iPhone app! (now, if I just had an iPhone...)

You can "like" them on Facebook here

Thursday, February 3, 2011

Tater Tot Toppers

This is one of my family's favorite meals, though it's not necessarily the most healthy - it's super quick & easy. We have it every now and then as a fun meal.

1 regular-sized bag frozen tator tots
1 can chili with beans (just a cheap one is fine)
1 can kidney or pinto beans (drained & rinsed)
sour cream
cheddar cheese
onion or green onions

This is so easy... You cook up the tator tots according to package directions - usually about 400 degrees for 20 minutes or so. I cook them on a round (pizza-sized) stone, so you don't have to turn them over. Sometimes I do them on convection, to be sure they all get crispy!

While they're cooking, mix the can of chili together with the can of beans and warm up - I usually just mix them together in a microwavable container and warm it in the microwave, but you can heat it on the stove if you prefer. Chop up some onion or slice some green onions. Shred some cheddar (or whatever you like) cheese and put it in a bowl.

On the table you put your bowl of tator tots, a bowl of chili-n-beans, a small bowl of onions, a small bowl of cheese, and some sour cream. We put the tator tots on the plate, then pile with chili-stuff, cheese, sour cream & onions. Of course, different members of the family use different combinations of the toppings. I tend to add hot peppers to mine! :)

Serve it with a nice salad or green vegetable. We feed 5 and usually have a serving or two left-over for lunch the next day.

Wednesday, February 2, 2011

Snow Ice Cream - Guest Chef

Perfect recipe for a blizzard day - except you actually have to go outside to get the snow...

This is from my super-friend De'Reen Whitney Vyleta. Enjoy!

  • 2 cups milk
  • 1 tsp vanilla
  • 1 cup sugar
  • 1 gallon CLEAN snow

...In a mixing bowl, mix milk and sugar together until sugar is dissolved.

De'Reen used a hand mixer. I'm thinking about trying this in my KitchenAid.

Slowly add the snow to your mixture, stirring constantly until it is as thick as ice cream.

Thursday, January 27, 2011

Absolutely the Best Chocolate Chip Cookie Recipe - Guest Chef

This cookie recipe is from my very dear friend, John Lansford. He is a master cookie maker - and sometimes even sends me boxes of cookies half-way across the country!

(yes, there's been some time off since I posted... I got myself into some kind of weird mind-set that it takes too long to put these together, and I never found time to do it. Well, it only takes time if I agonize over it, so please forgive me if you find the occasional typo. I'd rather get these out and not stress about perfection!!)

---------

This is absolutely the best chocolate chip recipe I've ever tried. The cookies are soft, chewy, tasty and do not dry out over time. Plus, you can vary the flavor and appearance of the cookies by changing what flavor of pudding mix you use.

Ingredients:

4 1/2 cups all-purpose flour
2 tsp baking soda
2 cups butter
1 1/2 cups brown sugar
1/2 cup white sugar
2 3.4 oz packages of Jello instant pudding mix
4 eggs
3 tsp vanilla extract
4 cups semisweet chocolate chips
2 cups chopped walnuts or pecans (optional)

Step 1: In a seperate bowl, mix the flour and baking soda together and set aside

Step 2: Melt the butter in the microwave; 45 seconds should do it

Step 3: Add the brown and white sugar to the melted butter; mix together well.

Step 4: Add the intant pudding mix packages; I've used vanilla, cheesecake, or even lemon pudding flavors, as well as chocolate or chocolate fudge flavors.  More on the chocolate mix variation later.

Step 5: Add the eggs and vanilla extract and mix well.  Add the chocolate chips and nuts (if you want them).

Step 6: Gradually add the flour/baking soda mixture to the dough a little at a time, stirring until it is completely mixed in before adding more.

Preheat the oven to 350 degrees.  Using parchment paper on your baking sheets, drop tablespoon-sized amounts of dough on the sheets, and bake for 10-12 minutes until golden brown on the edge.  Makes  about 8 dozen cookies!

NOTE: I've had great results using chocolate pudding and white chocolate chips with this recipe.  Instead of a light colored cookie with dark chips, you get a dark cookie with white chips.  You can also add a tablespoon of creme de menthe to the standard recipe if you want a mint flavored chocolate chip cookie!

Monday, November 22, 2010

Nameless after school snack

DSC04825Invented a new after-school snack today. The hardest part for me is always coming up with names for things! So - this one needs your help! Please suggest names!

I had some thick sliced whole grain white bread (day-old - maybe 2 or 3 days...). I spread each slice with ranch dressing and sprinkled a little mozzarella cheese on top. Then I toasted them in the toaster oven.

The kids were crazy about them! I had to make more! Very quick and tasty.

DSC04824

Ham & Swiss Crustless Quiche - Guest Chef!

Thanks to my friend Cindy Hainchek for sharing this yummy dinner she served her family tonight. Sounds terrific! Wish I would have been up there to share it with them!

Ham and Swiss crust-less quiche and sauteed asparagus for dinner. quick and delish!

You need an iron skillet for this.

Feeds 3

6 large eggs
5T milk
1t salt
1/2t nutmeg
1T olive oil
1/2c deli ham, chopped
4oz. Swiss cheese, cut into chunks

Heat oven to broil. In small mixing bowl, combine first four ingredients, whisk well. heat olive oil in skillet on med. high. Pour egg mixture, ham, and cheese into skillet. Cook until eggs are set around edges. Place on middle rack under broiler about 3 min. until brown on top and set in the middle. Let it set and cool.

Saute' asparagus in olive oil, salt, and pepper until crisp-tender.

Saturday, November 20, 2010

Easy Chicken Broth

The next day after baked chicken (or any dinner where chicken and bones is left over), I summon up all my motherly power, wash my hands and prepare to touch meat (one of my most despised activities).

I take the cold chicken out of the fridge and remove all the big chunks of meat that easily come off the bones. Those pieces, I cut into smaller strips or bite-size pieces for use in other meals later (fajitas, casseroles, soups, stir-fry, etc.). The bones and any meat that’s still stuck to them goes into a large pot.

I add water to cover the bones and a couple inches over that. If there are lots of bones & stuff, I may even have the water twice as high as the level of bones. Then I put the cover on the pot, and turn the stove on medium-high.

Now a lot of folks add other things to chicken broth such as onions, celery, carrots, garlic, bay leaves, other spices, etc. Those are all great, but I don’t notice a significantly worthwhile addition in flavor, and it adds an extra step to the end of the broth-making that I don’t want to do. J So I don’t add anything. I just let the chicken & broth come to a boil, then turn the power down to low and let it simmer for a couple of hours.

The length of time it simmers is not that important. It just needs to simmer at least until the remaining meat on the bones wants to fall off. That’s really subjective, but remember, your chicken was already fully-cooked from before, so you are safe to cook the broth as long or short as you want. The longer it simmers, the stronger the flavor of the broth, but the more evaporates away.

When I think it’s simmered long enough, I use a slotted spoon to remove the chunks of bone, meat, skin, whatever, to a large cutting board. The cutting board I have (Pampered Chef, of course) has a small moat around the outside, so any extra juice that may have come out of the pot with the bones, goes to settle in there, and I can pour it back into the pot. This is really handy. Otherwise, you can expect to get some broth on your counter.

Then after it cools a few minutes, I summon up all my braveness once again and go through the stuff with my hands. This is a careful job, because there are little tiny bones in chicken that like to disguize themselves as meat – and it’s never fun to get a piece of bone in a nice chicken soup. So I am careful to get all the bones out of the meat. All the bits of boneless meat then go into a storage container for the fridge or freezer, and all the bones, skin, cartillage, etc, go into a bowl for disposal. If you had put in all the extra stuff – veggies, spices, etc – you would have to throw all those away now, too.

I pour the broth into a large storage container to cool. As you pour it, you’ll notice it’s not beautiful and clear. If you planned to make a professional-looking clear golden chicken broth-based soup, you’d need to strain all this stuff out. But you’d also lose all the flavor and nutrients you find in that floaty-stuff. So I don’t strain it. When I make soup, there’s enough other stuff in it, that you can’t tell that the broth is not clear.

If it’s cool outside, I will set the container outside for a while before sticking it into the fridge – just because that’s rough on the fridge to have to try to cool a big container of hot broth.

The broth really needs to sit in the fridge at least overnight. This gives all the fat a chance to rise to the top. Carefully take the container out of the fridge – you don’t want to slosh it around. Carefully take off the lid and you will see a nasty solid layer of chicken fat. Take a spoon and get all that out and throw it away! It’s SO easy to scrape off. The kids actually think it’s fun. Now you have practically fat-free chicken broth that is SO flavorful! At this point, you can put it into smaller storage containers for freezing or you can just start making soup!

Wednesday, November 17, 2010

Baked Chicken

I wanted to title this "the evolution of a chicken," but realized this should be several posts since it's technically different recipes... so here we go.

Chicken has got to be one of the most versatile things to cook with. There are about a gazillion ways to cook and serve it. And, there are ways to do it cheaply.

I always buy whatever cuts are cheapest by pound (that means my kitchen never sees the boneless skinless chicken breasts). Usually that's thighs, legs, or leg quarters. Now I realize that there is more fat in the dark meat, but there's also more flavor, so you can get away with putting less into whatever you're making and still have that good chicken-y flavor while saving some bucks!

We rarely eat a meal that has a chunk of meat as the star of the meal. That's what we always had as I was growing up, so this is a change for me, but I don't miss it often. This is one meal that's an exception.

I got 6 cheap leg quarters on sale the other day and began plans for several meals. Here's meal #1:

Baked chicken - this is so stinkin' easy. The worst part is taking the chicken out of the packaging and washing it. I really hate touching the raw meat (even writing that is making me cringe....ewwww), so I get a kid to do it when I can - haha. I run it under tepid water and gently scrub off any ick that may be on the skin. I also attempt to tear off any obvious chunks of fat. Those go in the garbage (rather than down the drain).

Then just put the chicken in a baking pan - skin side up (I use a stoneware 9x13 cake pan that has a stoneware cover - makes a nice little stone oven thingy - but you can just put it in any pan and cover with foil (shiny side down - you want to reflect the heat back into the pan - not away from it). If you have a rack to keep the chicken off the bottom of the pan - great. If not, it works just fine. You can also use an onion and/or a potato as a rack. Cut them in big pieces to cover the bottom of the pan and lay the chicken on top. Usually those aren't great to eat afterwards, so I don't do that often (I hate wasting food).

Plan for it to bake about an hour at 350 or so. Again - temperature and time is all relative. Lower temperature/longer time and vice versa. You DO need to have a meat thermometer. Don't fool around with undercooked chicken. Be sure that your chicken's internal temperature is at least 180°. If you've not used a meat thermometer before - never fear! It's not hard. Just pull your pan of chicken out for a minute and set on top of the stove (you can check the temp while it's inside the oven, but you lose a lot of heat out of your oven that way - and you run the risk of bumping your hand against a hot part of the oven and getting a nasty burn. Might as well just take it out for a sec). Find the thickest part of your fattest piece of chicken - usually the fat part of a thigh or thick part of a leg - then stick in the thermometer so that the tip is near the center of that thickness. Stick it in at an angle so you can get as much of the thermometer into the meat as possible. You don't want the tip to touch bone or to come out the other side and touch pan. Either of those scenarios will mess up your reading. I usually test a couple different places to make sure I've got an accurate reading. Once you're at 180° - you're good to go.  Some say to take it out a few degrees before 180° - that it will continue cooking for a few minutes out of the oven. I guess I'd rather have it a smidge dryer and be sure that I'm avoiding the salmonella. But of course, all of this is up to you! :)

Browning is also a subjective thing. If the chicken's internal temp is 180°, the chicken is done. Even if the skin is lighter than you think it should be. If you like the outside of your chicken to look browner, then take off your cover/foil during the last 10-15 minutes of cooking - you'll have to guess, of course, because you're going off temperature, not time. It's really flexible. Don't worry.

If the chicken was baking down in the fat & juices, I will take each piece out with tongs and pat it on a paper towel before putting it on the serving plate.

Like I said before, we don't eat a lot of meat by itself, so this is a big treat meal for our family. I make mashed potatoes, a vegetable or two, and cranberries. If I'm really in a mood, I'll make rolls. The little kids each got one drumstick and the bigger people each got one thigh. We fill up on the vegetables. The rest of the chicken has quite a life ahead of it - so I don't let folks pig out on the meat.

If you're doing your math - then you'll realize I still have three thighs and 4 legs left over. These go in the fridge (along with the bones from the pieces that were eaten - really!). Tomorrow we make broth! :)

Saturday, October 30, 2010

Chickeny Ricey (schlop-it-together) Soup

There are lots of meals I make once and then never make again. Not because we didn't like them, but because we may never have that exact combination of 'stuff' in the house at the same time - right when I happen to get that idea. This was one of those that turned out to be really good! But I don't know if it will ever come around again.

So I list it here as an example of a cheap family dinner - but also as an example of a way to be creative. I hope you rarely use my recipes exactly as written. I hope you use your own creativity and your own family's tastes, and whatever happens to be in your own fridge - so that you can create quick, tasty meals for your family, too!

This was one of those nights that it was already after 6pm and I had not thought about dinner at all. Of course, everyone is hungry, and I'm beginning to hear that from some of them.

So I went to the pantry and looked. It's kinda a blank stare as you see all kinds of cans and packages of not-necessarily related things.

"Oh, that would be good, but I don't have _____. Well, what about _______? That sounds good. No, that will take too long. Hmm..."
DSC04411


So here are the two things I pulled out: a can of chicken & sausage gumbo soup and a package of chicken-flavored rice side-dish thingy. Hey - they both have chicken in them, and there's a little bit of rice in the gumbo anyway, maybe they'll go together.

I cooked up the chicken side-dish thingy according to it's directions in one pot on the stove while heating up the soup in another pan on the stove. When the rice thingy was done, I dumped it into the pot of soup and stirred. It was pretty thick, so I added a full soup can of water. I had some frozen smoked sausage links that are the size of large hot dogs, so cut 3 of them up into 1/4-1/2 inch slices and dumped them in. That's it. The addition of the rice, sausages, and water increased the amount, so that there was plenty for all 5 of us. There was even about one serving left for someone's lunch the next day.

I think that can of soup is about $1.50 at Aldi. The rice thing is under $2, and the 3 sausages were part of a large package that I probably got for $3-$4. So they were certainly under $1. You do the math (because I hate math - haha). We served essentially 6 people for under $5. This night I didn't make anything to go with the soup (I was in a hurry, remember?), so I just tossed some saltine crackers on the table to go with the soup. Some crumbled them up into the soup, some dipped, and some didn't eat any crackers. Everyone told me how great the soup was and ate til they were full! What a deal.

What un-related things have you put together to make a meal? How have you been creative with a can of soup?

Thursday, October 28, 2010

Mexican Dinner

Here's my first guest blogger's recipe! I'm so excited! Let me introduce you to John Lansford, one of my oldest friends - NOT that he's old, of course - he's just one of the few friends with whom I still keep in touch from my childhood in TN. Here he was being our Dungeon Master for what I'm sure was a watered-down version of Dungeons & Dragons.

As you can see, John was/is very lovable - as we are piling on him for a group hug. That's my old neighbor, Lindley, on the left, John on the bottom of the pile, my sister Kristin, and me on the right.

John is a great gardener and a great chef who now lives in NC. He is very generous and often brings cookies and treats to his friends. I wish I lived closer so I could be a recipient (though he has been known to mail a box of goodies!!)!

Please enjoy his recipe for Mexican Dinner:

Karin,

Here's my recipe for what we always called "Mexican dinner".  My mom used to make this and it fed six people, including 3 hungry boys, so it should be a good one!  I've made a few modifications to it over the years, adding the cinnamon, salsa, and fresh jalapenos...

1 pound ground beef, browned and drained
1 large green pepper, diced
1/2 red onion, chopped
2 cans of diced tomatoes, drained
2 jalapeƱo peppers (optional)
1 jar of salsa 
Taco seasoning
Pinch of cinnamon
Ground black pepper
Cayenne pepper
Bag of corn chips
Cheddar or pepper jack cheese
Lettuce
1 fresh tomato

Step one: Brown the ground beef in a skillet and drain all the fat off of it.  Add two cans of diced tomatoes to the ground beef after draining most of the liquid out of them and stir together. Add half of the jar of salsa and stir. Reduce heat to simmer.

Step two: Chop a green pepper into small pieces and add to the ground beef mix. Chop the onion in half and cut one half of it into small pieces and add them into the mix as well.  Slice the jalapeƱos into pieces and add too.  Stir together.  If you don't like spicy meals omit the jalapeƱos.

Step three: Add about a teaspoon of taco seasoning to the mix, plus the black pepper, cayenne and cinnamon.  If you don't like spicy meals omit the cayenne pepper.  Add to flavor; I shake the black and cayenne pepper over the entire mix for a few seconds, enough to go over the whole area.  Cover and heat the mixture until thoroughly hot and it's got the consistancy you want.

Step four:  Chop the lettuce into small pieces and put in a bowl.  Do the same with the tomato, drain and put in a bowl as well.  Shred your choice of cheese; these three go on your dinner table.

To serve:  Place a layer of corn chips (or tortilla chips) on a plate, then add the ground beef mixture on top.  Sprinkle cheese, chopped lettuce and tomatoes, and any remaining salsa on top of the mix.

Serves 4; scale the recipe up proportionately if you need to serve more people.

Preperation time is about 30 minutes.
--
John's Shop of Wood
http://wood.jlansford.net/
--


Do you have a recipe you'd like to share on Cheap Family Dinner? Please let me know! I'd love to have you as a guest blogger! :) Email me at cheapfamilydinner@techhelpplease.com . I look forward to getting some great ideas from your kitchens!

Wednesday, October 27, 2010

Awesome pretzel dip

OK - this is definitely not a main course, but the kids told me to put this on the blog, so you get it!

Someone in our house inevitably will buy pretzels from time to time for one reason or another, thinking that we will eat them. Then the bag sits, opened, 3/4 full, and unloved. So I invented a pretzel dip - in an attempt to get rid of a bag of pretzels - and now the kids WANT to get pretzels, just so I'll make the dip.

Pretzels are better for you than chips, so this is probably better for them than other snacks they might make.

It's almost embarrassing to put down what's in it - you will think, "that's lame." But just try it once, and you will be pleasantly surprised!

It's just mayo (or miracle whip/salad dressing stuff) and spicy brown mustard.

You take half as much mustard as you use mayo and mix it up. That's it. Really! Then dunk a pretzel in it and enjoy.

Remember, I rarely measure anything, so obviously, these measurements are approximate. Start with the mayo and add some mustard until it tastes the way you like it. Go for some zing, because pretzels are boring otherwise! :)

Low-fat and no-fat mayo works just as well, because it's just there to calm down the zing of the mustard.

If you have both those ingredients in your house - and pretzels of course - go mix up just enough to try,  i.e. 2 tsp mayo & 1 tsp spicy brown mustard. I bet you'll like it.

Now, when I've been out of spicy brown mustard, I bet you'll be surprised to learn (not!) that I've tried other things in its place. Spicy brown is definitely my favorite, but it's also good with honey mustard, plain yellow mustard, even spicy Chinese mustard. Whatever you have - give it a try!  Enjoy! :)

Tuesday, October 26, 2010

Cheesy bread

DSC04523This is great to enjoy alongside pasta, or it's a yummy stand-alone appetizer/snack to eat with a football game. (Today it was an after-school snack that was running a little late coming out of the oven, so I had two hungry munchkins anxiously waiting for it to get done. They weren't thrilled when I said, "Wait, I have to take a picture first!", but they smiled anyway when I included them in the picture.)

I adapted the recipe after eating cheese nuggets from a wonderful pizza place here in DeKalb. Theirs are greasier and scrumptious. Mine are more fluffy than greasy, so I have to think mine are healthier! :)

This is so easy and so delicious, you're not going to believe it!

It's the same as my pizza dough - except I make a little less than for a big pizza.

1.5 c flour
2 tsp yeast
1/2 tsp salt
2 tsp sugar
1 tbsp olive oil
(other spices & goodies... optional)
less than 1 c hot water

Follow the same instructions for making pizza dough, except for this, I make it a little softer/stickier. So that's just a little more water, or less flour.

Fun stuff in the dough: This time, I chopped up one of my last garden tomatoes - it was about 1/2 green, so I chopped it up into small pieces. They cooked up nicely in the dough and added a touch of red & green color &  nice flavor. I also added diced onion, Italian spices, garlic powder, & black pepper.

Smoosh your dough down into a greased round pan. I use a pampered chef round stone, but you could use a quiche pan, a round cake pan, or probably even a square pan (though the corners might get overdone in order to cook the middle well-enough). In a pinch, you could just flatten it out (into whatever shape you wanted) on a pizza stone or cookie sheet.

For plain cheesy bread, just sprinkle on enough mozzarella to cover the bread (really, as much or as little as you want!) and sprinkle a little oregano.

I can never make the same thing the same way twice! This time, I scattered a few slices of pepperoni & cheddar cheese - because I was out of mozz!

Pop it in a cold oven and set it for 500 degrees! Yes, really, 500 degrees! If you can adjust your oven racks, try to have it just a smidge below the center of your oven. You don't want the cheese getting too cooked & brown before the dough is cooked.

DSC04521Set your timer for 15 minutes and come check it then. It may need up to 5 minutes more. Right when you take it out - sprinkle it with a little grated parmesan cheese and garlic salt.

Then I just pop it out onto a chopping block & cut into squares. When it's plain cheesy bread, we dip it into warmed up marinara sauce (Merrick doesn't because he doesn't like the tomatoes, so he eats them plain). Today, we just ate the little puffy cheddary pepperoni breads plain. They were delish!

Sunday, October 24, 2010

Pizza

DSC04390
forgot to take a pic before we started eating it! haha!
This is definitely my family's favorite. Merrick doesn't like anything with cooked tomatoes, so I have to make a special section for him, but the rest of us like (almost) anything and everything on it!

This is another great way to clean out your fridge, because you can put almost anything on a pizza, and it's great. I'll give you the basics - and then list some ideas at the end.

Some people think homemade pizza takes a long time, but it really doesn't have to. I've perfected a pizza crust recipe that you can make in under 5 minutes. Then just schlop stuff on top and bake it for about 20 minutes - and you're a hero! :)


Crust:
2 cups flour
1 tbsp sugar
1/2 tsp salt
2 tsp dry yeast powder (I buy this in bulk at Sam's Club and keep it in the freezer. We go through a lot of yeast at our house)
2 tbsp oil (olive oil is best for this, but any normal cooking oil will work)
about 1 cup of warmest tap water

That's the basic recipe - but I rarely make it that way. I almost always double this and make 2 pizzas at once. The five of us just eat about one for a meal, but what's better than left-over pizza?

Then I usually use garlic salt instead of plain salt and add tons of spices. The crust can have a nice flavor that enhances the overall taste of your pizza. So - I'll dump in oregano, basil, garlic, onion powder, hot peppers, etc. You're going to ask me how much now, aren't you. Well, I don't really know - you'll just have to experiment to get the flavor you want (again - just be brave. It's almost impossible to mess up!).


OK - here's what to do. Again - the kitchenaid is your friend! Put everything (except the water) in the mixer and mix on lowest speed. Get about a cup of the hottest water you can get from your tap and drizzle it as slowly as you can into the dry ingredients, while it's on low speed. As soon as the mixture pulls away from the sides of the bowl, stop pouring and let it run for about a minute or two (if you accidentally pour in too much water so that it starts sticking to the sides of the bowl again, don't panic! Just start slowly adding flour until it's all stuck around the beater again - no harm!)

Turn off the mixer and let it sit for about 5 minutes. (This is a good time to go see what creative things you can find in your fridge to throw on your pizza!)

I wouldn't make a pizza on anything but a (pampered chef) pizza stone, but I've had other folks' homemade pizzas that were excellent made on things other than stones - so it's up to you...

I also don't use a normal rolling pin. I love my (pampered chef) double-sided rolling pin. Here's something that's close...

I roll the dough right over the edges of the stone. Being a yeast dough, it bounces back time after time - so you have to roll it for a while. When you finally subdue your dough, then the fun begins.

DSC04385
Summer is the best for pizza (if you can stand to heat up your kitchen - blah!) because fresh tomatoes are SO much better than sauce on pizza. I just slice the tomatoes - about 1/4 inch-ish (but it's all up to how tomatoey you like your pizza!!) and schlopp them all over the crust. Then sprinkle them with Italian seasonings - oregano, basil, etc., garlic, salt & fresh-ground pepper. If the pizza were just for me, I'd add hot peppers, but in order to keep friends in my family, I have to leave them off and add them at the table.

DSC04386One one of our pizzas, I have to leave a section with no tomatoes for goofy Merrick, but it still ends up being great - just put some olive oil on the crust (or not) and sprinkle the spices.

Then go crazy! This is a great time to involve the kids. Let them dump whatever they want all over, or mark off sections with toothpicks to remember whose area is whose. We put small pieces of black or green olive or onion on the toothpicks to show what is in which area.

For a 'normal' garbage pizza - we use whatever's in the fridge, but our favs are:
spicy italian sausage (Aldi has delicious hot sausage that's inexpensive and not too hot)
green & black olives
onions
peppers (green, red, banana, whatever...)
pepperoni
mushrooms (fresh are best, of course)
spinach (or any other vegetables...)
ham (canadian bacon is terrific, but WAY too expensive!)
bacon (bacon bits??)
don't look at my dirty oven! haha

and don't forget the cheese!
We like mozzarella - but Merrick likes cheddar and mozz.

Put your masterpiece(s) in a COLD oven and set it for 350 degrees. When I do two, I put it on convect and set it for about 325. If you don't have convect, you will want to swap spots a time or two, or else the crust on your top one will not cook in the middle and the cheese on the bottom one will not brown. Check them after 20 minutes then give them a few more minutes until the cheese is nice & brown (to your liking).

When you don't have fresh tomatoes - don't sweat it. Schlop a small can of plain old tomato sauce (not pizza sauce - just plain tomato sauce - about 25 cents) all over the crust and sprinkle with those same spices. It all cooks together and makes the most delish sauce. People don't believe that I haven't made my own sauce separately!

DSC04389
OK - now for fun variations!

  • spinach, black olives, onions, & feta cheese
  • ketchup (instead of sauce & spices) cooked ground hamburger, onions, & cheddar cheese - serve with mustard & pickles - a family favorite
  • mild taco sauce (instead of sauce & spices), taco meat, refried beans, onions, green olives, onions, cheddar cheese - serve with lettuce, fresh tomatoes, sour cream, other taco topping stuff. 
  • ham & pineapple
  • ham & swiss cheese
  • spinach & fresh mushroom
  • broccoli & cheddar cheese
  • get creative & have a blast!