Monday, November 22, 2010

Nameless after school snack

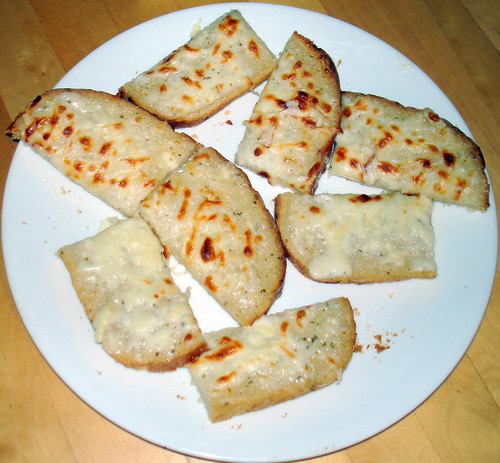
DSC04825Invented a new after-school snack today. The hardest part for me is always coming up with names for things! So - this one needs your help! Please suggest names!

I had some thick sliced whole grain white bread (day-old - maybe 2 or 3 days...). I spread each slice with ranch dressing and sprinkled a little mozzarella cheese on top. Then I toasted them in the toaster oven.

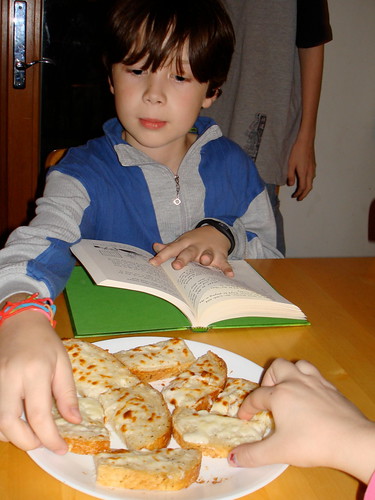
The kids were crazy about them! I had to make more! Very quick and tasty.

DSC04824

Ham & Swiss Crustless Quiche - Guest Chef!

Thanks to my friend Cindy Hainchek for sharing this yummy dinner she served her family tonight. Sounds terrific! Wish I would have been up there to share it with them!

Ham and Swiss crust-less quiche and sauteed asparagus for dinner. quick and delish!

You need an iron skillet for this.

Feeds 3

6 large eggs
5T milk
1t salt
1/2t nutmeg
1T olive oil
1/2c deli ham, chopped
4oz. Swiss cheese, cut into chunks

Heat oven to broil. In small mixing bowl, combine first four ingredients, whisk well. heat olive oil in skillet on med. high. Pour egg mixture, ham, and cheese into skillet. Cook until eggs are set around edges. Place on middle rack under broiler about 3 min. until brown on top and set in the middle. Let it set and cool.

Saute' asparagus in olive oil, salt, and pepper until crisp-tender.

Saturday, November 20, 2010

Easy Chicken Broth

The next day after baked chicken (or any dinner where chicken and bones is left over), I summon up all my motherly power, wash my hands and prepare to touch meat (one of my most despised activities).

I take the cold chicken out of the fridge and remove all the big chunks of meat that easily come off the bones. Those pieces, I cut into smaller strips or bite-size pieces for use in other meals later (fajitas, casseroles, soups, stir-fry, etc.). The bones and any meat that’s still stuck to them goes into a large pot.

I add water to cover the bones and a couple inches over that. If there are lots of bones & stuff, I may even have the water twice as high as the level of bones. Then I put the cover on the pot, and turn the stove on medium-high.

Now a lot of folks add other things to chicken broth such as onions, celery, carrots, garlic, bay leaves, other spices, etc. Those are all great, but I don’t notice a significantly worthwhile addition in flavor, and it adds an extra step to the end of the broth-making that I don’t want to do. J So I don’t add anything. I just let the chicken & broth come to a boil, then turn the power down to low and let it simmer for a couple of hours.
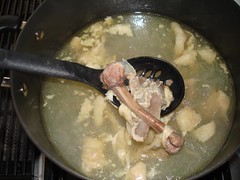
The length of time it simmers is not that important. It just needs to simmer at least until the remaining meat on the bones wants to fall off. That’s really subjective, but remember, your chicken was already fully-cooked from before, so you are safe to cook the broth as long or short as you want. The longer it simmers, the stronger the flavor of the broth, but the more evaporates away.

When I think it’s simmered long enough, I use a slotted spoon to remove the chunks of bone, meat, skin, whatever, to a large cutting board. The cutting board I have (Pampered Chef, of course) has a small moat around the outside, so any extra juice that may have come out of the pot with the bones, goes to settle in there, and I can pour it back into the pot. This is really handy. Otherwise, you can expect to get some broth on your counter.

Then after it cools a few minutes, I summon up all my braveness once again and go through the stuff with my hands. This is a careful job, because there are little tiny bones in chicken that like to disguize themselves as meat – and it’s never fun to get a piece of bone in a nice chicken soup. So I am careful to get all the bones out of the meat. All the bits of boneless meat then go into a storage container for the fridge or freezer, and all the bones, skin, cartillage, etc, go into a bowl for disposal. If you had put in all the extra stuff – veggies, spices, etc – you would have to throw all those away now, too.

I pour the broth into a large storage container to cool. As you pour it, you’ll notice it’s not beautiful and clear. If you planned to make a professional-looking clear golden chicken broth-based soup, you’d need to strain all this stuff out. But you’d also lose all the flavor and nutrients you find in that floaty-stuff. So I don’t strain it. When I make soup, there’s enough other stuff in it, that you can’t tell that the broth is not clear.

If it’s cool outside, I will set the container outside for a while before sticking it into the fridge – just because that’s rough on the fridge to have to try to cool a big container of hot broth.

The broth really needs to sit in the fridge at least overnight. This gives all the fat a chance to rise to the top. Carefully take the container out of the fridge – you don’t want to slosh it around. Carefully take off the lid and you will see a nasty solid layer of chicken fat. Take a spoon and get all that out and throw it away! It’s SO easy to scrape off. The kids actually think it’s fun. Now you have practically fat-free chicken broth that is SO flavorful! At this point, you can put it into smaller storage containers for freezing or you can just start making soup!
Wednesday, November 17, 2010

Baked Chicken

I wanted to title this "the evolution of a chicken," but realized this should be several posts since it's technically different recipes... so here we go.

Chicken has got to be one of the most versatile things to cook with. There are about a gazillion ways to cook and serve it. And, there are ways to do it cheaply.

I always buy whatever cuts are cheapest by pound (that means my kitchen never sees the boneless skinless chicken breasts). Usually that's thighs, legs, or leg quarters. Now I realize that there is more fat in the dark meat, but there's also more flavor, so you can get away with putting less into whatever you're making and still have that good chicken-y flavor while saving some bucks!

We rarely eat a meal that has a chunk of meat as the star of the meal. That's what we always had as I was growing up, so this is a change for me, but I don't miss it often. This is one meal that's an exception.

I got 6 cheap leg quarters on sale the other day and began plans for several meals. Here's meal #1:

Baked chicken - this is so stinkin' easy. The worst part is taking the chicken out of the packaging and washing it. I really hate touching the raw meat (even writing that is making me cringe....ewwww), so I get a kid to do it when I can - haha. I run it under tepid water and gently scrub off any ick that may be on the skin. I also attempt to tear off any obvious chunks of fat. Those go in the garbage (rather than down the drain).

Then just put the chicken in a baking pan - skin side up (I use a stoneware 9x13 cake pan that has a stoneware cover - makes a nice little stone oven thingy - but you can just put it in any pan and cover with foil (shiny side down - you want to reflect the heat back into the pan - not away from it). If you have a rack to keep the chicken off the bottom of the pan - great. If not, it works just fine. You can also use an onion and/or a potato as a rack. Cut them in big pieces to cover the bottom of the pan and lay the chicken on top. Usually those aren't great to eat afterwards, so I don't do that often (I hate wasting food).

Plan for it to bake about an hour at 350 or so. Again - temperature and time is all relative. Lower temperature/longer time and vice versa. You DO need to have a meat thermometer. Don't fool around with undercooked chicken. Be sure that your chicken's internal temperature is at least 180°. If you've not used a meat thermometer before - never fear! It's not hard. Just pull your pan of chicken out for a minute and set on top of the stove (you can check the temp while it's inside the oven, but you lose a lot of heat out of your oven that way - and you run the risk of bumping your hand against a hot part of the oven and getting a nasty burn. Might as well just take it out for a sec). Find the thickest part of your fattest piece of chicken - usually the fat part of a thigh or thick part of a leg - then stick in the thermometer so that the tip is near the center of that thickness. Stick it in at an angle so you can get as much of the thermometer into the meat as possible. You don't want the tip to touch bone or to come out the other side and touch pan. Either of those scenarios will mess up your reading. I usually test a couple different places to make sure I've got an accurate reading. Once you're at 180° - you're good to go.  Some say to take it out a few degrees before 180° - that it will continue cooking for a few minutes out of the oven. I guess I'd rather have it a smidge dryer and be sure that I'm avoiding the salmonella. But of course, all of this is up to you! :)

Browning is also a subjective thing. If the chicken's internal temp is 180°, the chicken is done. Even if the skin is lighter than you think it should be. If you like the outside of your chicken to look browner, then take off your cover/foil during the last 10-15 minutes of cooking - you'll have to guess, of course, because you're going off temperature, not time. It's really flexible. Don't worry.

If the chicken was baking down in the fat & juices, I will take each piece out with tongs and pat it on a paper towel before putting it on the serving plate.

Like I said before, we don't eat a lot of meat by itself, so this is a big treat meal for our family. I make mashed potatoes, a vegetable or two, and cranberries. If I'm really in a mood, I'll make rolls. The little kids each got one drumstick and the bigger people each got one thigh. We fill up on the vegetables. The rest of the chicken has quite a life ahead of it - so I don't let folks pig out on the meat.

If you're doing your math - then you'll realize I still have three thighs and 4 legs left over. These go in the fridge (along with the bones from the pieces that were eaten - really!). Tomorrow we make broth! :)