Monday, November 22, 2010

Nameless after school snack

DSC04825Invented a new after-school snack today. The hardest part for me is always coming up with names for things! So - this one needs your help! Please suggest names!

I had some thick sliced whole grain white bread (day-old - maybe 2 or 3 days...). I spread each slice with ranch dressing and sprinkled a little mozzarella cheese on top. Then I toasted them in the toaster oven.

The kids were crazy about them! I had to make more! Very quick and tasty.

DSC04824

Ham & Swiss Crustless Quiche - Guest Chef!

Thanks to my friend Cindy Hainchek for sharing this yummy dinner she served her family tonight. Sounds terrific! Wish I would have been up there to share it with them!

Ham and Swiss crust-less quiche and sauteed asparagus for dinner. quick and delish!

You need an iron skillet for this.

Feeds 3

6 large eggs
5T milk
1t salt
1/2t nutmeg
1T olive oil
1/2c deli ham, chopped
4oz. Swiss cheese, cut into chunks

Heat oven to broil. In small mixing bowl, combine first four ingredients, whisk well. heat olive oil in skillet on med. high. Pour egg mixture, ham, and cheese into skillet. Cook until eggs are set around edges. Place on middle rack under broiler about 3 min. until brown on top and set in the middle. Let it set and cool.

Saute' asparagus in olive oil, salt, and pepper until crisp-tender.

Saturday, November 20, 2010

Easy Chicken Broth

The next day after baked chicken (or any dinner where chicken and bones is left over), I summon up all my motherly power, wash my hands and prepare to touch meat (one of my most despised activities).

I take the cold chicken out of the fridge and remove all the big chunks of meat that easily come off the bones. Those pieces, I cut into smaller strips or bite-size pieces for use in other meals later (fajitas, casseroles, soups, stir-fry, etc.). The bones and any meat that’s still stuck to them goes into a large pot.

I add water to cover the bones and a couple inches over that. If there are lots of bones & stuff, I may even have the water twice as high as the level of bones. Then I put the cover on the pot, and turn the stove on medium-high.

Now a lot of folks add other things to chicken broth such as onions, celery, carrots, garlic, bay leaves, other spices, etc. Those are all great, but I don’t notice a significantly worthwhile addition in flavor, and it adds an extra step to the end of the broth-making that I don’t want to do. J So I don’t add anything. I just let the chicken & broth come to a boil, then turn the power down to low and let it simmer for a couple of hours.

The length of time it simmers is not that important. It just needs to simmer at least until the remaining meat on the bones wants to fall off. That’s really subjective, but remember, your chicken was already fully-cooked from before, so you are safe to cook the broth as long or short as you want. The longer it simmers, the stronger the flavor of the broth, but the more evaporates away.

When I think it’s simmered long enough, I use a slotted spoon to remove the chunks of bone, meat, skin, whatever, to a large cutting board. The cutting board I have (Pampered Chef, of course) has a small moat around the outside, so any extra juice that may have come out of the pot with the bones, goes to settle in there, and I can pour it back into the pot. This is really handy. Otherwise, you can expect to get some broth on your counter.

Then after it cools a few minutes, I summon up all my braveness once again and go through the stuff with my hands. This is a careful job, because there are little tiny bones in chicken that like to disguize themselves as meat – and it’s never fun to get a piece of bone in a nice chicken soup. So I am careful to get all the bones out of the meat. All the bits of boneless meat then go into a storage container for the fridge or freezer, and all the bones, skin, cartillage, etc, go into a bowl for disposal. If you had put in all the extra stuff – veggies, spices, etc – you would have to throw all those away now, too.

I pour the broth into a large storage container to cool. As you pour it, you’ll notice it’s not beautiful and clear. If you planned to make a professional-looking clear golden chicken broth-based soup, you’d need to strain all this stuff out. But you’d also lose all the flavor and nutrients you find in that floaty-stuff. So I don’t strain it. When I make soup, there’s enough other stuff in it, that you can’t tell that the broth is not clear.

If it’s cool outside, I will set the container outside for a while before sticking it into the fridge – just because that’s rough on the fridge to have to try to cool a big container of hot broth.

The broth really needs to sit in the fridge at least overnight. This gives all the fat a chance to rise to the top. Carefully take the container out of the fridge – you don’t want to slosh it around. Carefully take off the lid and you will see a nasty solid layer of chicken fat. Take a spoon and get all that out and throw it away! It’s SO easy to scrape off. The kids actually think it’s fun. Now you have practically fat-free chicken broth that is SO flavorful! At this point, you can put it into smaller storage containers for freezing or you can just start making soup!

Wednesday, November 17, 2010

Baked Chicken

I wanted to title this "the evolution of a chicken," but realized this should be several posts since it's technically different recipes... so here we go.

Chicken has got to be one of the most versatile things to cook with. There are about a gazillion ways to cook and serve it. And, there are ways to do it cheaply.

I always buy whatever cuts are cheapest by pound (that means my kitchen never sees the boneless skinless chicken breasts). Usually that's thighs, legs, or leg quarters. Now I realize that there is more fat in the dark meat, but there's also more flavor, so you can get away with putting less into whatever you're making and still have that good chicken-y flavor while saving some bucks!

We rarely eat a meal that has a chunk of meat as the star of the meal. That's what we always had as I was growing up, so this is a change for me, but I don't miss it often. This is one meal that's an exception.

I got 6 cheap leg quarters on sale the other day and began plans for several meals. Here's meal #1:

Baked chicken - this is so stinkin' easy. The worst part is taking the chicken out of the packaging and washing it. I really hate touching the raw meat (even writing that is making me cringe....ewwww), so I get a kid to do it when I can - haha. I run it under tepid water and gently scrub off any ick that may be on the skin. I also attempt to tear off any obvious chunks of fat. Those go in the garbage (rather than down the drain).

Then just put the chicken in a baking pan - skin side up (I use a stoneware 9x13 cake pan that has a stoneware cover - makes a nice little stone oven thingy - but you can just put it in any pan and cover with foil (shiny side down - you want to reflect the heat back into the pan - not away from it). If you have a rack to keep the chicken off the bottom of the pan - great. If not, it works just fine. You can also use an onion and/or a potato as a rack. Cut them in big pieces to cover the bottom of the pan and lay the chicken on top. Usually those aren't great to eat afterwards, so I don't do that often (I hate wasting food).

Plan for it to bake about an hour at 350 or so. Again - temperature and time is all relative. Lower temperature/longer time and vice versa. You DO need to have a meat thermometer. Don't fool around with undercooked chicken. Be sure that your chicken's internal temperature is at least 180°. If you've not used a meat thermometer before - never fear! It's not hard. Just pull your pan of chicken out for a minute and set on top of the stove (you can check the temp while it's inside the oven, but you lose a lot of heat out of your oven that way - and you run the risk of bumping your hand against a hot part of the oven and getting a nasty burn. Might as well just take it out for a sec). Find the thickest part of your fattest piece of chicken - usually the fat part of a thigh or thick part of a leg - then stick in the thermometer so that the tip is near the center of that thickness. Stick it in at an angle so you can get as much of the thermometer into the meat as possible. You don't want the tip to touch bone or to come out the other side and touch pan. Either of those scenarios will mess up your reading. I usually test a couple different places to make sure I've got an accurate reading. Once you're at 180° - you're good to go.  Some say to take it out a few degrees before 180° - that it will continue cooking for a few minutes out of the oven. I guess I'd rather have it a smidge dryer and be sure that I'm avoiding the salmonella. But of course, all of this is up to you! :)

Browning is also a subjective thing. If the chicken's internal temp is 180°, the chicken is done. Even if the skin is lighter than you think it should be. If you like the outside of your chicken to look browner, then take off your cover/foil during the last 10-15 minutes of cooking - you'll have to guess, of course, because you're going off temperature, not time. It's really flexible. Don't worry.

If the chicken was baking down in the fat & juices, I will take each piece out with tongs and pat it on a paper towel before putting it on the serving plate.

Like I said before, we don't eat a lot of meat by itself, so this is a big treat meal for our family. I make mashed potatoes, a vegetable or two, and cranberries. If I'm really in a mood, I'll make rolls. The little kids each got one drumstick and the bigger people each got one thigh. We fill up on the vegetables. The rest of the chicken has quite a life ahead of it - so I don't let folks pig out on the meat.

If you're doing your math - then you'll realize I still have three thighs and 4 legs left over. These go in the fridge (along with the bones from the pieces that were eaten - really!). Tomorrow we make broth! :)

Saturday, October 30, 2010

Chickeny Ricey (schlop-it-together) Soup

There are lots of meals I make once and then never make again. Not because we didn't like them, but because we may never have that exact combination of 'stuff' in the house at the same time - right when I happen to get that idea. This was one of those that turned out to be really good! But I don't know if it will ever come around again.

So I list it here as an example of a cheap family dinner - but also as an example of a way to be creative. I hope you rarely use my recipes exactly as written. I hope you use your own creativity and your own family's tastes, and whatever happens to be in your own fridge - so that you can create quick, tasty meals for your family, too!

This was one of those nights that it was already after 6pm and I had not thought about dinner at all. Of course, everyone is hungry, and I'm beginning to hear that from some of them.

So I went to the pantry and looked. It's kinda a blank stare as you see all kinds of cans and packages of not-necessarily related things.

"Oh, that would be good, but I don't have _____. Well, what about _______? That sounds good. No, that will take too long. Hmm..."
DSC04411


So here are the two things I pulled out: a can of chicken & sausage gumbo soup and a package of chicken-flavored rice side-dish thingy. Hey - they both have chicken in them, and there's a little bit of rice in the gumbo anyway, maybe they'll go together.

I cooked up the chicken side-dish thingy according to it's directions in one pot on the stove while heating up the soup in another pan on the stove. When the rice thingy was done, I dumped it into the pot of soup and stirred. It was pretty thick, so I added a full soup can of water. I had some frozen smoked sausage links that are the size of large hot dogs, so cut 3 of them up into 1/4-1/2 inch slices and dumped them in. That's it. The addition of the rice, sausages, and water increased the amount, so that there was plenty for all 5 of us. There was even about one serving left for someone's lunch the next day.

I think that can of soup is about $1.50 at Aldi. The rice thing is under $2, and the 3 sausages were part of a large package that I probably got for $3-$4. So they were certainly under $1. You do the math (because I hate math - haha). We served essentially 6 people for under $5. This night I didn't make anything to go with the soup (I was in a hurry, remember?), so I just tossed some saltine crackers on the table to go with the soup. Some crumbled them up into the soup, some dipped, and some didn't eat any crackers. Everyone told me how great the soup was and ate til they were full! What a deal.

What un-related things have you put together to make a meal? How have you been creative with a can of soup?

Thursday, October 28, 2010

Mexican Dinner

Here's my first guest blogger's recipe! I'm so excited! Let me introduce you to John Lansford, one of my oldest friends - NOT that he's old, of course - he's just one of the few friends with whom I still keep in touch from my childhood in TN. Here he was being our Dungeon Master for what I'm sure was a watered-down version of Dungeons & Dragons.

As you can see, John was/is very lovable - as we are piling on him for a group hug. That's my old neighbor, Lindley, on the left, John on the bottom of the pile, my sister Kristin, and me on the right.

John is a great gardener and a great chef who now lives in NC. He is very generous and often brings cookies and treats to his friends. I wish I lived closer so I could be a recipient (though he has been known to mail a box of goodies!!)!

Please enjoy his recipe for Mexican Dinner:

Karin,

Here's my recipe for what we always called "Mexican dinner".  My mom used to make this and it fed six people, including 3 hungry boys, so it should be a good one!  I've made a few modifications to it over the years, adding the cinnamon, salsa, and fresh jalapenos...

1 pound ground beef, browned and drained
1 large green pepper, diced
1/2 red onion, chopped
2 cans of diced tomatoes, drained
2 jalapeño peppers (optional)
1 jar of salsa 
Taco seasoning
Pinch of cinnamon
Ground black pepper
Cayenne pepper
Bag of corn chips
Cheddar or pepper jack cheese
Lettuce
1 fresh tomato

Step one: Brown the ground beef in a skillet and drain all the fat off of it.  Add two cans of diced tomatoes to the ground beef after draining most of the liquid out of them and stir together. Add half of the jar of salsa and stir. Reduce heat to simmer.

Step two: Chop a green pepper into small pieces and add to the ground beef mix. Chop the onion in half and cut one half of it into small pieces and add them into the mix as well.  Slice the jalapeños into pieces and add too.  Stir together.  If you don't like spicy meals omit the jalapeños.

Step three: Add about a teaspoon of taco seasoning to the mix, plus the black pepper, cayenne and cinnamon.  If you don't like spicy meals omit the cayenne pepper.  Add to flavor; I shake the black and cayenne pepper over the entire mix for a few seconds, enough to go over the whole area.  Cover and heat the mixture until thoroughly hot and it's got the consistancy you want.

Step four:  Chop the lettuce into small pieces and put in a bowl.  Do the same with the tomato, drain and put in a bowl as well.  Shred your choice of cheese; these three go on your dinner table.

To serve:  Place a layer of corn chips (or tortilla chips) on a plate, then add the ground beef mixture on top.  Sprinkle cheese, chopped lettuce and tomatoes, and any remaining salsa on top of the mix.

Serves 4; scale the recipe up proportionately if you need to serve more people.

Preperation time is about 30 minutes.
--
John's Shop of Wood
http://wood.jlansford.net/
--


Do you have a recipe you'd like to share on Cheap Family Dinner? Please let me know! I'd love to have you as a guest blogger! :) Email me at cheapfamilydinner@techhelpplease.com . I look forward to getting some great ideas from your kitchens!

Wednesday, October 27, 2010

Awesome pretzel dip

OK - this is definitely not a main course, but the kids told me to put this on the blog, so you get it!

Someone in our house inevitably will buy pretzels from time to time for one reason or another, thinking that we will eat them. Then the bag sits, opened, 3/4 full, and unloved. So I invented a pretzel dip - in an attempt to get rid of a bag of pretzels - and now the kids WANT to get pretzels, just so I'll make the dip.

Pretzels are better for you than chips, so this is probably better for them than other snacks they might make.

It's almost embarrassing to put down what's in it - you will think, "that's lame." But just try it once, and you will be pleasantly surprised!

It's just mayo (or miracle whip/salad dressing stuff) and spicy brown mustard.

You take half as much mustard as you use mayo and mix it up. That's it. Really! Then dunk a pretzel in it and enjoy.

Remember, I rarely measure anything, so obviously, these measurements are approximate. Start with the mayo and add some mustard until it tastes the way you like it. Go for some zing, because pretzels are boring otherwise! :)

Low-fat and no-fat mayo works just as well, because it's just there to calm down the zing of the mustard.

If you have both those ingredients in your house - and pretzels of course - go mix up just enough to try,  i.e. 2 tsp mayo & 1 tsp spicy brown mustard. I bet you'll like it.

Now, when I've been out of spicy brown mustard, I bet you'll be surprised to learn (not!) that I've tried other things in its place. Spicy brown is definitely my favorite, but it's also good with honey mustard, plain yellow mustard, even spicy Chinese mustard. Whatever you have - give it a try!  Enjoy! :)

Tuesday, October 26, 2010

Cheesy bread

DSC04523This is great to enjoy alongside pasta, or it's a yummy stand-alone appetizer/snack to eat with a football game. (Today it was an after-school snack that was running a little late coming out of the oven, so I had two hungry munchkins anxiously waiting for it to get done. They weren't thrilled when I said, "Wait, I have to take a picture first!", but they smiled anyway when I included them in the picture.)

I adapted the recipe after eating cheese nuggets from a wonderful pizza place here in DeKalb. Theirs are greasier and scrumptious. Mine are more fluffy than greasy, so I have to think mine are healthier! :)

This is so easy and so delicious, you're not going to believe it!

It's the same as my pizza dough - except I make a little less than for a big pizza.

1.5 c flour
2 tsp yeast
1/2 tsp salt
2 tsp sugar
1 tbsp olive oil
(other spices & goodies... optional)
less than 1 c hot water

Follow the same instructions for making pizza dough, except for this, I make it a little softer/stickier. So that's just a little more water, or less flour.

Fun stuff in the dough: This time, I chopped up one of my last garden tomatoes - it was about 1/2 green, so I chopped it up into small pieces. They cooked up nicely in the dough and added a touch of red & green color &  nice flavor. I also added diced onion, Italian spices, garlic powder, & black pepper.

Smoosh your dough down into a greased round pan. I use a pampered chef round stone, but you could use a quiche pan, a round cake pan, or probably even a square pan (though the corners might get overdone in order to cook the middle well-enough). In a pinch, you could just flatten it out (into whatever shape you wanted) on a pizza stone or cookie sheet.

For plain cheesy bread, just sprinkle on enough mozzarella to cover the bread (really, as much or as little as you want!) and sprinkle a little oregano.

I can never make the same thing the same way twice! This time, I scattered a few slices of pepperoni & cheddar cheese - because I was out of mozz!

Pop it in a cold oven and set it for 500 degrees! Yes, really, 500 degrees! If you can adjust your oven racks, try to have it just a smidge below the center of your oven. You don't want the cheese getting too cooked & brown before the dough is cooked.

DSC04521Set your timer for 15 minutes and come check it then. It may need up to 5 minutes more. Right when you take it out - sprinkle it with a little grated parmesan cheese and garlic salt.

Then I just pop it out onto a chopping block & cut into squares. When it's plain cheesy bread, we dip it into warmed up marinara sauce (Merrick doesn't because he doesn't like the tomatoes, so he eats them plain). Today, we just ate the little puffy cheddary pepperoni breads plain. They were delish!

Sunday, October 24, 2010

Pizza

DSC04390
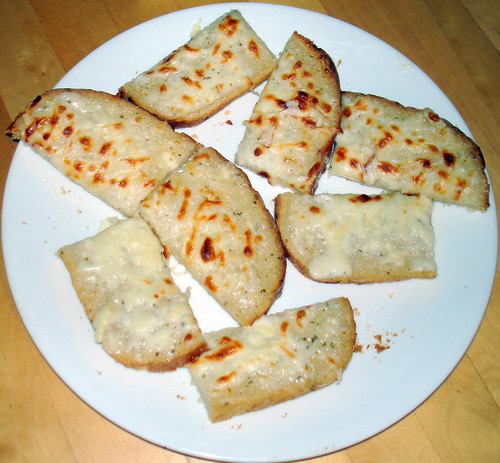
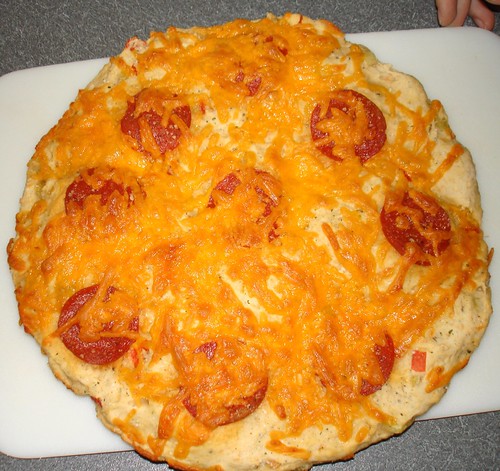
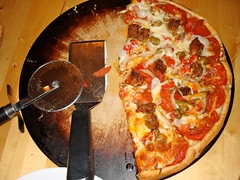
forgot to take a pic before we started eating it! haha!
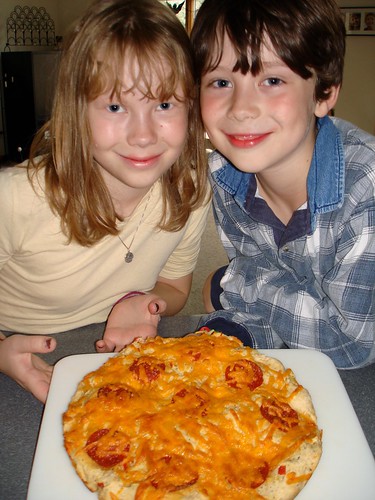
This is definitely my family's favorite. Merrick doesn't like anything with cooked tomatoes, so I have to make a special section for him, but the rest of us like (almost) anything and everything on it!

This is another great way to clean out your fridge, because you can put almost anything on a pizza, and it's great. I'll give you the basics - and then list some ideas at the end.

Some people think homemade pizza takes a long time, but it really doesn't have to. I've perfected a pizza crust recipe that you can make in under 5 minutes. Then just schlop stuff on top and bake it for about 20 minutes - and you're a hero! :)


Crust:
2 cups flour
1 tbsp sugar
1/2 tsp salt
2 tsp dry yeast powder (I buy this in bulk at Sam's Club and keep it in the freezer. We go through a lot of yeast at our house)
2 tbsp oil (olive oil is best for this, but any normal cooking oil will work)
about 1 cup of warmest tap water

That's the basic recipe - but I rarely make it that way. I almost always double this and make 2 pizzas at once. The five of us just eat about one for a meal, but what's better than left-over pizza?

Then I usually use garlic salt instead of plain salt and add tons of spices. The crust can have a nice flavor that enhances the overall taste of your pizza. So - I'll dump in oregano, basil, garlic, onion powder, hot peppers, etc. You're going to ask me how much now, aren't you. Well, I don't really know - you'll just have to experiment to get the flavor you want (again - just be brave. It's almost impossible to mess up!).


OK - here's what to do. Again - the kitchenaid is your friend! Put everything (except the water) in the mixer and mix on lowest speed. Get about a cup of the hottest water you can get from your tap and drizzle it as slowly as you can into the dry ingredients, while it's on low speed. As soon as the mixture pulls away from the sides of the bowl, stop pouring and let it run for about a minute or two (if you accidentally pour in too much water so that it starts sticking to the sides of the bowl again, don't panic! Just start slowly adding flour until it's all stuck around the beater again - no harm!)

Turn off the mixer and let it sit for about 5 minutes. (This is a good time to go see what creative things you can find in your fridge to throw on your pizza!)

I wouldn't make a pizza on anything but a (pampered chef) pizza stone, but I've had other folks' homemade pizzas that were excellent made on things other than stones - so it's up to you...

I also don't use a normal rolling pin. I love my (pampered chef) double-sided rolling pin. Here's something that's close...

I roll the dough right over the edges of the stone. Being a yeast dough, it bounces back time after time - so you have to roll it for a while. When you finally subdue your dough, then the fun begins.

DSC04385
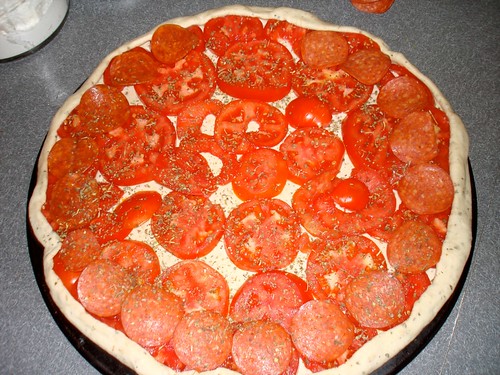
Summer is the best for pizza (if you can stand to heat up your kitchen - blah!) because fresh tomatoes are SO much better than sauce on pizza. I just slice the tomatoes - about 1/4 inch-ish (but it's all up to how tomatoey you like your pizza!!) and schlopp them all over the crust. Then sprinkle them with Italian seasonings - oregano, basil, etc., garlic, salt & fresh-ground pepper. If the pizza were just for me, I'd add hot peppers, but in order to keep friends in my family, I have to leave them off and add them at the table.

DSC04386
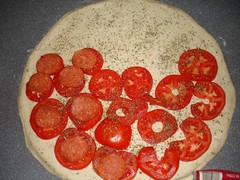
One one of our pizzas, I have to leave a section with no tomatoes for goofy Merrick, but it still ends up being great - just put some olive oil on the crust (or not) and sprinkle the spices.

Then go crazy! This is a great time to involve the kids. Let them dump whatever they want all over, or mark off sections with toothpicks to remember whose area is whose. We put small pieces of black or green olive or onion on the toothpicks to show what is in which area.

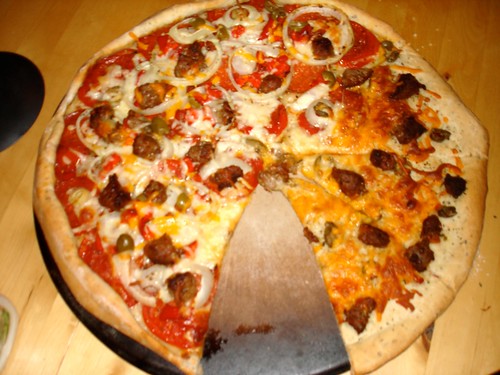
For a 'normal' garbage pizza - we use whatever's in the fridge, but our favs are:
spicy italian sausage (Aldi has delicious hot sausage that's inexpensive and not too hot)
green & black olives
onions
peppers (green, red, banana, whatever...)
pepperoni
mushrooms (fresh are best, of course)
spinach (or any other vegetables...)
ham (canadian bacon is terrific, but WAY too expensive!)
bacon (bacon bits??)
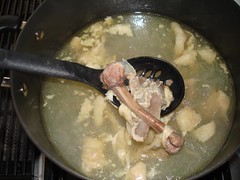
don't look at my dirty oven! haha

and don't forget the cheese!
We like mozzarella - but Merrick likes cheddar and mozz.

Put your masterpiece(s) in a COLD oven and set it for 350 degrees. When I do two, I put it on convect and set it for about 325. If you don't have convect, you will want to swap spots a time or two, or else the crust on your top one will not cook in the middle and the cheese on the bottom one will not brown. Check them after 20 minutes then give them a few more minutes until the cheese is nice & brown (to your liking).

When you don't have fresh tomatoes - don't sweat it. Schlop a small can of plain old tomato sauce (not pizza sauce - just plain tomato sauce - about 25 cents) all over the crust and sprinkle with those same spices. It all cooks together and makes the most delish sauce. People don't believe that I haven't made my own sauce separately!

DSC04389
OK - now for fun variations!

  • spinach, black olives, onions, & feta cheese
  • ketchup (instead of sauce & spices) cooked ground hamburger, onions, & cheddar cheese - serve with mustard & pickles - a family favorite
  • mild taco sauce (instead of sauce & spices), taco meat, refried beans, onions, green olives, onions, cheddar cheese - serve with lettuce, fresh tomatoes, sour cream, other taco topping stuff. 
  • ham & pineapple
  • ham & swiss cheese
  • spinach & fresh mushroom
  • broccoli & cheddar cheese
  • get creative & have a blast!
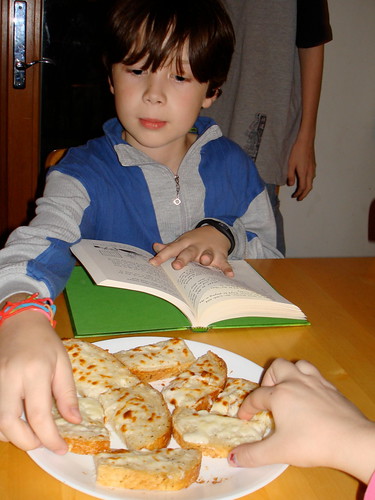
Friday, October 22, 2010

Meat Flats

Well, they're not really meatballs - because they're flat. They're not meatloaf - because, well, they're not in a loaf. They look more like meat splats, but flats sounds better. :)

[I'm open to better names! Give them a try, then leave a comment with what your family thinks they should be called! Meat lumps? Hockey pucks? haha]

Ingredients:

ground beef (and/or ground pork)
onions (chopped fine)
eggs
saltine crackers (smashed fine)
milk
salt & pepper (to taste)
other spices if you want to make them garlicky or southwesterny or Italiany, etc.

The recipe is more of a formula than exact measurements - so it all depends on how many meat flats you want to make!

For 1 lb of ground beef, I use 2 eggs, a whole small-medium onion, and a whole sleeve of saltine crackers. I put all those ingredients into the kitchenaid mixer and let it stir on low. Then I add milk while it's going until it's a softish consistent texture - no lumps of meat here & there. You're going to have to experiment with this one - but it's really hard to mess up.

If you're not totally grossed out by touching food as I am, you can mix all this up with your hands. I would probably die if I had to do that. I didn't make meatballs or meatloaf for years, because my mom & dad always mixed that up with their hands and then formed the meatballs with their hands. It wasn't until I realized I could dump the package of meat and other ingredients into the mixer and use other utensils to avoid touching the food altogether that I started making this. My family is very appreciative of this discovery!

When it's all mixed up we get out the "George" (our George Foreman grill). We have a cheap old George that works just fine. There are much cooler newer ones out there now. The only thing I wish was that ours was larger. Whatever I make on it, I tend to have to make in batches, so you have to keep the food warm somewhere - or the family eats in stages. It's not a big deal, and I'm too cheap to go buy a new one!


I heat George up to 300° and use my large Pampered Chef scoop to splat some meat onto the grill. Then put the lid down, and they cook away until they're nice and brown on the outside.

To make sure they're really done, you can stick a meat thermometer in one and make sure the internal temperature is at least 160°. I like them closer to 170°-180°.

We like mashed potatoes, some vegetable (usually corn or green beans), and cranberries with meatflats. The worst part about doing them on the George is that you can't make gravy. Meatball gravy is one of the greatest things in the entire world. But it's a tradeoff for making them quickly enough for a family dinner.

It's always a good idea to make too many while you're at it - because cold meatflat sandwiches the next day are awesome! :)

Thursday, October 14, 2010

Omelets

Omelets are great to make when not everyone will be able to eat at the same time. We have them probably more often for dinner than breakfast - which is probably not the norm - but they're great anytime. This recipe needs more showing than writing, so first watch the presentation - then the video.

Ingredients are, once again, totally flexible.
Essential
eggs
water
cheese (some people make omelets without cheese, but that's just weird scrambled eggs in my book...)

Additional ingredients - go raid your fridge. Any leftover meat, veggies, etc will be great. We like ham, onions, mushrooms, peppers, bacon, sausage... get creative! Omelets are really hard to mess up.


Now for the flip:

Sunday, October 10, 2010

Chicken Ranch Gorditas

Yeah, I know a gordita refers to the puffy kind of bread thing that wraps around this sandwich at taco bell, but we just made them with plain flour tortillas and called them gorditas. The name is much cooler when it comes off a commercial!

flour tortillas
left-over chicken
ranch dressing
salsa
tortilla chips
lettuce
** and whatever**

Once while having tacos, and typically pulling everything out of the fridge for the "taco bar", Merrick found some left-over chicken and asked if he could make a chicken ranch gordita - because he had heard a commercial for those.
So we just schlopped some ranch dressing on the tortilla, layed a few pieces of cold left-over chicken on there, and he wrapped it up and loved it. It's now one of his favorite meals! Some others of us added salsa and lettuce, and they were pretty darn good!

Tacos

Kelan tells me that I shouldn't JUST write about the odd things I make up, but should also report on "normal" meals we have. I guess that's a good idea, because even if it's something you already make, it may have slipped your mind. And this blog is hopefully a source of ideas. I guess they don't all have to be new ideas.
So I'll tell you about tacos at our house. Of course, they're not necessarily normal here...

We take all the ingredients below and spread them out on the kitchen counter. Then you go down & make your own taco like a buffet line. Otherwise, you drag 400 things to the table and have to pass 400 things around the table and then have to drag 400 things back to the fridge. Taco bars are our friend! :)

Necessary:
tortillas - (we like soft flour tortillas and Aldi has good ones. You can make your own if you want. I've done that, and I'm not great at it. They're not hard, and the kids loved them, but they were too time consuming for me.... If you really want to make them, you'd need one of these - but I'm not ready to get that, yet.)

The rest are all optional ingredients. If we have it, we use it - if we're out - it gets skipped for that meal.
taco meat (ground beef/turkey with taco seasoning)
*note* when we're feeling poor - or out of beef - we just skip the taco meat. Sometimes I mix the envelope of taco seasoning in with the can of refried beans for that taco-ey flavor, but other times not. Once you get all the rest of the goodies on there, you can barely notice the missing taco meat!!
refried beans
kidney beans
shredded cheese
cheese sauce (salsa con queso at Aldi's - YUM)
lettuce
sour cream
olives (black and/or green)
onions (plain cheap yellow ones chopped up or [$$] green onions, sliced)
green peppers (other colors? whatever)
banana peppers
jalapeño peppers
salsa
and whatever else is in your fridge! :)

chips & salsa on the table

Again - this is one of those great occasions for being creative.
leftover vegetables when sprinkled into the refried beans go great with everything else!
One of Merrick's favorite meals was an accident with tortillas... I'll post that one next.

Here are some other cool things to do with tortillas:

Wednesday, October 6, 2010

Fried Rice

One of the best ways to use up leftovers from the fridge, fried rice is one of my family's favorites.

The only necessary ingredients are:
rice
soy sauce
eggs

The rest is left up to your creativity and what's in your fridge.


Tonight I used:
onion chopped (about 1/2 of an onion left-over from something else. I usually like it with at least a whole onion - but I like onions!)
2 stalks celery chopped
two small garden carrots chopped
two medium green tomatoes chopped (any left-over or fresh veggies are great - frozen mixed vegetables, zucchini, etc.)
about a cup of chopped up left-over pork chops

Saute the veggies in a little butter - until they are soft.
Add the rice & mix (amount of rice is not important - use whatever you have. You want more rice than veggies - but the ratio is totally flexible).


When the rice is heated with the veggies - scoot the mixture to one side of your pan. Add a little butter/oil and crack 2-4 eggs (depending on how much goop you have and how much you like the eggs in your fried rice!) onto the clear area. Stir the eggs (scrambling them, per se) and cook them til almost completely cooked. Then mix them into the rice/veggie mixture. Finally add soy sauce to taste.

Now we have left-over fried rice - hahaha!

Please don't look in this book to see the fried rice recipe - because I probably did not come anywhere close to doing fried rice "correctly" - this is just how we like it. :)

Monday, October 4, 2010

Fried Green Tomatoes


No, not the movie, or the restaurant in Galena - fried green tomatoes are a great way to use up those unripened tomatoes before they are ruined by frost.

4-6 medium-large green tomatoes
2 eggs
1/2 cup milk
1 cup all-purpose flour
1/2 cup cornmeal
1/2 cup bread crumbs
2 teaspoons sea salt
1/4 teaspoon ground black pepper
vegetable oil for frying

Fill a large frying pan about 1/2 inch deep with vegetable oil. Heat to medium/medium-high
Wash & slice tomatoes about 1/2 inch thick
Coat tomatoes in flour.
Dip floured tomatoes in whisked egg & milk mixture.
Dredge tomatoes through bread crumb, cornmeal, salt & pepper mix.
Carefully put in frypan, leaving room between. Do not crowd.
When they start to brown, carefully turn over with a spatula, and cook until brown on both sides.
Remove from pan onto paper towels.